
with words and photographs by Claire and Lauren of Foxtail + Moss
The resurgence of yarn and macrame art is a welcomed trend in our book. We love the look of walls adorned with tapestries, textiles, organic fibers, and tons of texture. With weaving workshops popping up left and right, the craft is super accessible. Weaving is a centuries old tradition that can be as practical (in certain forms) as it is beautiful, but learning the ins and outs of loom weaving is an acquired skill – one that takes time to learn and patience to hone.
Call it the cheaters way if you will, but this faux weaving DIY is designed for those short on time and patience. Using cross stitch basics and a plastic mesh canvas, this wall hanging combines the art of weaving with a well loved children’s craft. And it’s simple enough that even the most loom-operating-challenged can master it in an afternoon.
What You'll Need
Plastic Mesh Canvas
Yarn
Large Plastic Yarn Needles
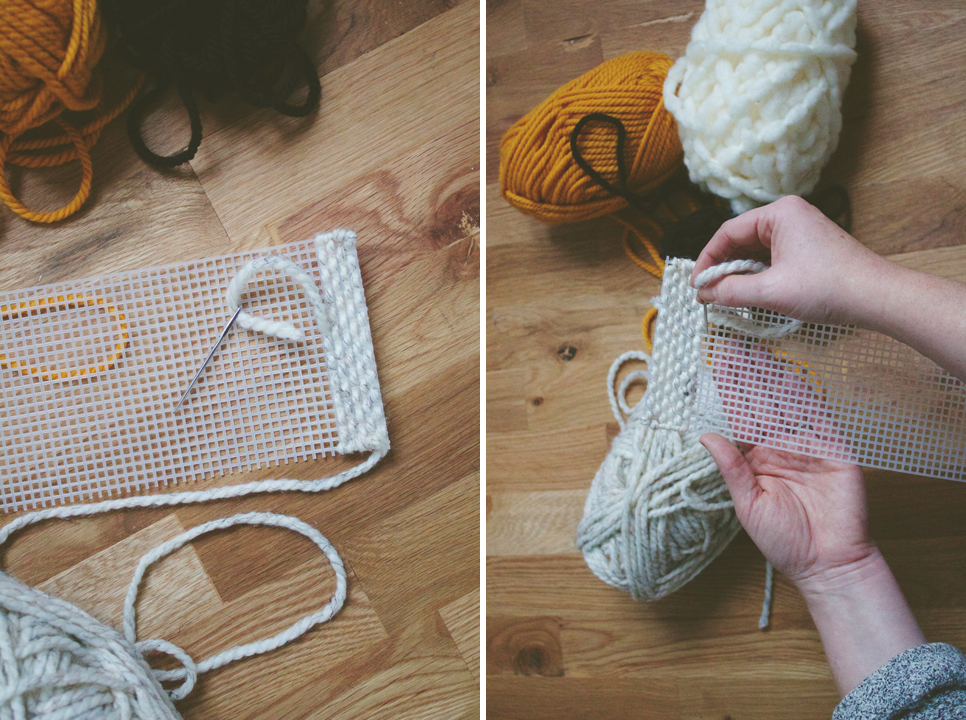
Cut a section of yarn about three feet in length and thread your needle. As you make your starting stitch, pulling your needle through the hole from the back of the canvas to the front, leave a “tail” of three to four inches of yarn hanging on the back side (or the “wrong side”). The first few stitches should be made over that tail to lock the yarn in place.
Use the following basic stitches to weave a pattern with plenty of texture. But don’t be afraid to get creative and go rouge with your stitches. There’s no wrong way to fill your canvas and the more creative you get, the more interesting your final product will be.
The Straight Stitch is the most basic stitch. Working in a horizontal row, bring your needle up from the wrong side through the first hole and down from the front through the second hole. Repeat this over/under motion working right to left in the first row and left to right in the second, and so on and so forth.
The Continental Stitch is essentially a diagonal version of the straight stitch. Bring your needle up from the wrong side through the second hole in the first row and down from the front through the first hole in the second row, creating a diagonal line.
The Larks Head Knot is used for fringe or for attaching a hanging loop. Fold a length of yarn in half. Bring the folded end up from the wrong side through the first hole. This creates a hanging loop. To create fringe, feed the ends of the yarn and through the loop and tighten. Trim the ends to desired fringe length.
When ending a row, before moving on to a different yarn, or when you’re down to the last few inches of a strand, turn over your canvas and run your needle under 4 or 5 stitches on the wrong side. Do the same when picking back up in the middle of a row or starting with a new strand of yarn.
Once your weaving is complete, use the Overcast Stitch to finish off the raw edges. Stitch around the outside edge of your canvas, putting one stitch in each hole along the straight edges and two or three stitches in each corner hole to hide any plastic canvas that might be peeking through.